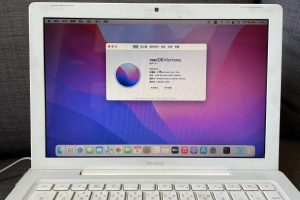
corellium团队正式发布了如何将Linux移植到M1芯片Mac电脑上。
下面是谷歌原文翻译成中文,附上原文链接和英文原文。
1.苹果酱
当苹果在2020年11月发布带有M1处理器的台式机产品时,许多技术界人士对这些系统的出色性能感到惊讶。但是那些一直关注苹果电话芯片组发展的人们都知道,苹果公司遵循的进化道路将产生强大的64位ARM处理器。
自Corelium 6于2014年发布以来,我们一直在Corellium上追踪Apple移动生态系统,该版本具有两个64位内核。从那时起,苹果一直将精力集中在构建更快的芯片上,而不是在芯片上投入更多的内核,而是更喜欢提高单线程性能。他们内部的硬件设计团队采用了这种方法,并产生了具有广泛功能集的独特部件,从而在架构功能方面处于业界领先地位。在CPU内核和外围设备方面,这也使Apple芯片与所有其他64位ARM硬件完全不同。我们的Corellium虚拟化平台一直在为安全研究人员提供有关Apple ARM处理器上的操作系统和程序工作方式的无与伦比的见解。但是,在开发虚拟化系统的过程中,我们还获得了有关正在建模的硬件的知识,并且可以通过对真实硬件进行测试来最好地完善这些知识-我们只能在出现checkm8时才能做到这一点,使我们可以将程序加载到Apple智能手机上的漏洞。这直接导致了Sandcastle项目,我们在2020年初为A10处理器构建了内核端口。
因此,当Apple决定允许在具有M1处理器的Mac上安装自定义内核时,我们很高兴尝试构建另一个Linux端口,以加深我们对硬件平台的了解。在为安全性研究产品创建处理器模型时,我们正在并行处理Linux端口。
2.启动端口
M1的许多组件与Apple移动SoC共享,这为我们提供了良好的起点。但是,在编写Linux驱动程序时,非常明显的是非标准Apple SoC的真实情况。我们的虚拟环境在可以容纳的模型方面非常灵活;但是在Linux方面,64位ARM领域主要依靠一套定义明确的构建块和固件接口-在M1上几乎没有使用。
首先,Apple CPU以不同的方式引导操作系统内核。引导加载程序(通常称为iBoot)以称为Mach-O的格式加载可执行的目标文件,可以选择将其压缩并包装为基于签名的基于ASN.1的包装器格式,称为IMG4。为了进行比较,普通的Linux在64位ARM上以平面二进制映像(可选地压缩并以少数几种容器格式之一)开始,或者在UEFI平台上以Windows风格的“ PE”可执行文件开始。
但是,真正的惊喜始于更多的CPU内核。在其他64位ARM系统上,这是通过通过称为PSCI的接口调用固件来完成的(少数系统使用轮询表,但固件仍由轮询表负责)。但是在M1上,CPU内核从MMIO寄存器指定的地址(设置为内核映像中的特定偏移量,然后由引导加载程序锁定)开始,然后简单地开始运行内核。
如果这还不够的话,Apple设计了自己的中断控制器,即Apple中断控制器(AIC),它与两种主要的ARM GIC标准都不兼容。不仅如此:计时器中断(通常与ARM上的每CPU常规中断连接)被路由到FIQ(一种强大的体系结构功能),在旧的32位ARM时代更为常见。自然,Linux内核不支持通过FIQ路径传递任何中断,因此我们必须添加它。
当您尝试使系统中的多个处理器相互通信时,必须提供一组处理器间中断(IPI)。在较旧的Apple SoC上,通过执行对AIC的MMIO访问,与IRQ的处理方式类似。但是在较新的版本上,Apple使用一组处理器核心寄存器来调度和确认IPI,它们又以FIQ的形式提供。因此,FIQ支持确实非常重要。幸运的是,我们在安全研究产品中对虚拟模型的研究已经为我们做好了准备。
在解决了一些额外的硬件问题之后,添加了一个预加载器,该预加载器充当Linux的包装器,并为启动处理器内核提供了蹦床,我们可以设置一个帧缓冲区,并看到代表该处理器八个内核的八只企鹅M1。
3.需要输入!
不幸的是,由于我们没有用于M1 Mac的UART电缆,因此我们不得不寻找另一种添加键盘(甚至鼠标)的方法。在M1 Mac Mini上实现此功能的方法基本上有以下三种:M1芯片中的内置USB主机(用于Thunderbolt / USB端口),PCIe上的xHCI USB主机(用于A型端口)和蓝牙。
虽然我们不会详细介绍Apple蓝牙,但我们会注意到它使用了我们的虚拟化产品支持的基于非标准PCIe的协议,不仅需要在M1芯片上提供PCIe端口,而且还为此协议编写了定制的内核驱动程序。这似乎是快速完成此任务的最坏选择。
这意味着我们可以选择使用PCIe和使用标准内核xHCI驱动程序,还是使用内置USB控制器。苹果已经在其芯片中使用Synopsys DWC3双角色USB控制器已有一段时间了,并且它具有Linux内核驱动程序。不幸的是,Apple还习惯于在控制器周围添加自定义逻辑,因此最终需要做很多工作。
M1上的PCIe和内置DWC3 USB控制器都使用IOMMU(称为DART)。苹果一直在以一致的,不断发展的方式完善其DART设计,从而产生了出色的,功能齐全的IOMMU。最新版本甚至还支持子页面内存保护,这在其他地方很少见。(上个月,我们在IOMMU和其他类似设备上发表了一篇博客文章。)
要将M1内的USB端口实际连接到Mac Mini背面的USB C型连接器,我们必须与I2C上的芯片进行交互(这意味着GPIO和I2C驱动程序),该芯片具有定制的固件。在构建虚拟模型时,我们已经看到了这些协议的协议。如果您对系统有鸟瞰的话,这也就不足为奇了。
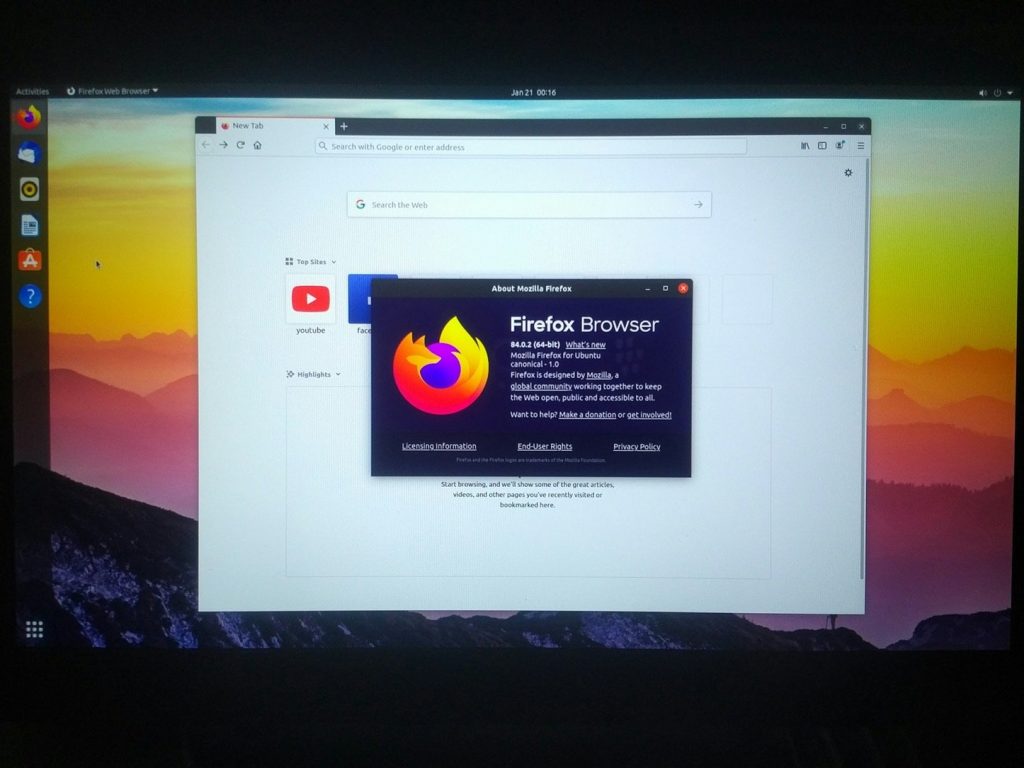
经过几天的研究,我们终于能够连接一个外部USB集线器并连接一个键盘,鼠标和一个闪存驱动器,从而为运行普通的桌面Linux发行版提供了可能性。
讲解
1.下载Ubuntu rootfs
在Mac Mini M1上启动Linux的第一步是在此处(提取码356655)下载Ubuntu POC rootfs 。我们使用Raspberry Pi映像是因为它是实时USB引导映像,因此我们仅需进行少量修改即可引导它。
2.提取图像
您将需要最少16G的外部USB驱动器。通过键入以下内容提取图像:
tar -xjvf ubuntu-20.10-preinstalled-desktop-arm64 + raspi.img.bz2
然后,使用磁盘实用程序找到外部磁盘的名称。最后,使用以下命令将映像复制到USB驱动器:
须藤dd if == / dev / rYOURUSBDISK bs = 1m = ubuntu-20.10-preinstalled-desktop-arm64 + raspi.img
3.连接到Mac
通过USB C端口使用加密狗将USB驱动器连接到Mac Mini M1。当前不支持USB A端口。
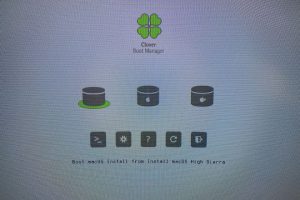
4.进入1TR
要启动到1TR(一个真正的恢复操作系统),请关闭Mac Mini M1,然后按住Power直到看到“加载选项”。加载后,您可以从顶部的菜单栏中选择终端选项。
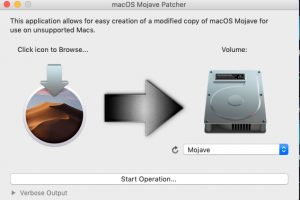
5.安装自定义内核
下一步是安装自定义内核。我们制作了一个脚本,可使您更轻松地执行此步骤。您可以通过键入以下内容运行它:
/ bin / bash -c“ $(curl -fsSL https://downloads.corellium.info/linuxsetup.sh)”
该脚本将提示您输入用户名和密码。您会看到它显示“已安装内核”,可以安全地键入 reboot。
6.登录
一旦启动,系统将提示您进行登录。用户名是“ pi”,密码是“ raspberry”。根密码也是“ raspberry”。
7.恢复到MacOS
要恢复引导MacOS,请在1TR打开终端中,键入bputil -n
——
如果您有兴趣支持我们在诸如此类的开源项目中的工作,请考虑代表我们向EFF捐款,后者为保护安全研究人员并保护用户和开发人员的数字权利做出了不懈的努力。您还应该考虑支持Asahi Linux上的工作。
我们要特别感谢PongoOS背后的工程师们贡献自己的专业知识和协作。我们期待使用PongoOS作为引导程序的版本进行更新!
原文链接 https://corellium.com/blog/linux-m1
英文原文:
1. Apple special sauce
When Apple released their desktop products with the M1 processor in November 2020, quite a few people in the tech community were surprised by the excellent performance of these systems. But those who have been following the development of Apple phone chipsets closely knew that the evolutionary path Apple followed would result in a powerful 64-bit ARM processor.
At Corellium, we’ve been tracking the Apple mobile ecosystem since iPhone 6, released in 2014 with two 64-bit cores. Since then, Apple has been focusing their energy on building faster chips, preferring to improve single-threaded performance over throwing more cores on the chip. This approach was enabled by their in-house hardware design team, and resulted in unique parts with a broad feature set, leading the industry in terms of architectural features.
It also made Apple silicon rather distinct from all other 64-bit ARM hardware in terms of both CPU core and peripherals. Our Corellium virtualization platform has been providing security researchers with unparalleled insight into how operating systems and programs work on Apple ARM processors. But in the process of developing our virtualization system, we also gain knowledge about the hardware we are modeling, and this knowledge can be best refined by testing it against real hardware – which we have only been able to do with the emergence of checkm8, an exploit that let us load programs onto Apple smartphones. This led directly to the Sandcastle project, where we built a kernel port to the A10 processor in early 2020.
So when Apple decided to allow installing custom kernels on the Macs with M1 processor, we were very happy to try building another Linux port to further our understanding of the hardware platform. As we were creating a model of the processor for our security research product, we were working on the Linux port in parallel.
2. Starting the port
Many components of the M1 are shared with Apple mobile SoCs, which gave us a good running start. But when writing Linux drivers, it became very apparent how non-standard Apple SoCs really are. Our virtual environment is extremely flexible in terms of models it can accommodate; but on the Linux side, the 64-bit ARM world has largely settled on a well-defined set of building blocks and firmware interfaces – nearly none of which were used on the M1.
To start with, Apple CPUs boot the operating system kernel in a different way. The bootloader, traditionally called iBoot, loads an executable object file in a format called Mach-O, optionally compressed and wrapped in a signed ASN.1 based wrapper format called IMG4. For comparison, normal Linux on 64-bit ARM starts as a flat binary image (optionally compressed and put in one of the few container formats), or a Windows-style “PE” executable on UEFI platforms.
But the real surprises start when further CPU cores are brought up. On other 64-bit ARM systems, this is done by calling the firmware through an interface called PSCI (a few systems use poll-tables, but the firmware is still responsible for them). But on M1, CPU cores start at an address specified by a MMIO register (set to a specific offset within the kernel image, then locked, by the bootloader), and simply begin running the kernel.
If that wasn’t enough, Apple designed their own interrupt controller, the Apple Interrupt Controller (AIC), not compatible with either of the major ARM GIC standards. And not only that: the timer interrupts – normally connected to a regular per-CPU interrupt on ARM – are instead routed to the FIQ, an abstruse architectural feature, seen more frequently in the old 32-bit ARM days. Naturally, Linux kernel did not support delivering any interrupts via the FIQ path, so we had to add that.
When you try to get multiple processors in a system to talk to each other, you have to provide a set of inter-processor interrupts (IPIs). On older Apple SoCs, those were handled similarly to IRQs, by executing MMIO accesses to the AIC. But on newer ones, Apple uses a set of processor core registers to dispatch and acknowledge IPIs, and they are – again – delivered as FIQs. So the FIQ support was really quite important. Fortunately, our work on virtual models in our security research product has prepared us for this.
After working out a few more hardware quirks, and adding a pre-loader that acts as a wrapper for Linux and provides a trampoline for starting processor cores, we could set a framebuffer and were greeted with the sight of eight penguins representing the eight cores of the M1.
3. Need input!
Unfortunately, since we do not have a UART cable for the M1 Macs, we had to find another way to add a keyboard (and maybe even a mouse). There are fundamentally three paths to do that on the M1 Mac Mini: the built-in USB host in the M1 chip (serves the Thunderbolt/USB ports), the xHCI USB host on PCIe (serves the type A ports) and Bluetooth.
While we won’t get into the details of Apple Bluetooth, we’ll note it uses a non-standard PCIe-based protocol that is supported in our virtualization product, and would require not only bringing up PCIe ports on the M1 chip, but also writing a custom kernel driver for this protocol. That made it seem like the worst choice for getting this done quickly.
This means we had a choice between bringing up PCIe and using the standard kernel xHCI driver, or bringing up the built-in USB controller. Apple has been using the Synopsys DWC3 dual-role USB controller for a while in their chips, and it has a Linux kernel driver. Unfortunately, Apple is also in the habit of adding custom logic around the controller, so this ended up being a fair bit of work.
Both the PCIe and the built-in DWC3 USB controller on M1 use IOMMUs, called DARTs. Apple has been refining their DART design in a consistent, evolutionary way, resulting in an excellent, full-featured IOMMU. The last version even has support for sub-page memory protection, rarely seen elsewhere. (We had a blog post on IOMMUs and other similar devices last month.)
To actually connect the USB port inside the M1 to the USB type-C connectors on the back of the Mac Mini, we had to interact with a chip on I2C (which means GPIO and I2C drivers) which has customized firmware. We’ve seen the protocol for these while building our virtualized models; nothing is a big surprise if you have a bird’s eye view of the system.
After a few days of figuring out the details of USB, we were finally able to connect an external USB hub and connect a keyboard, mouse and a Flash drive, opening the possibility for running a normal desktop Linux distribution.
Tutorial
1. Download the Ubuntu rootfs
The first step to booting Linux on your Mac Mini M1 is to download the Ubuntu POC rootfs available here. We used a Raspberry Pi image because it was a live USB boot image, so we only had to make minor modifications to boot it.
2. Extract the image
You will need a minimum 16G external USB drive. Extract the image by typing:
tar -xjvf ubuntu-20.10-preinstalled-desktop-arm64+raspi.img.bz2
Then, use disk utility to locate the name of the external disk. Finally, copy the image to the USB drive using:
sudo dd if=ubuntu-20.10-preinstalled-desktop-arm64+raspi.img of=/dev/rYOURUSBDISK bs=1m
3. Connect to the Mac
Connect your USB drive to the Mac Mini M1 using a dongle via the USB C port. The USB A ports are not currently supported.
4. Boot into 1TR
To boot into 1TR (the one true recovery OS), turn off your Mac Mini M1 and then hold Power until you see “loading options”. Once it loads, you can select the terminal option from the menu bar at the top.
5. Install the Custom Kernel
The next step is to install the custom kernel. We have made a script that makes this step easier for you. You can run it by typing:
/bin/bash -c “$(curl -fsSL https://downloads.corellium.info/linuxsetup.sh)”
The script will prompt you for your username and password. One you see it print “Kernel installed” it’s safe to type reboot.
6. Login
Once you’re booted, you’ll be prompted for a login. The username is “pi” and the password is “raspberry.” The root password is also “raspberry.”
7. Reverting to MacOS
To revert to booting MacOS, in 1TR open terminal and type bputil -n
——
If you’re interested in supporting our work on open source projects like these, please consider donating on our behalf to the EFF, who work tirelessly to defend security researchers and protect the digital rights of users and developers. You should also consider supporting the work being done by the folks over at Asahi Linux.
We’d like to extend a very special thanks to the engineers behind PongoOS for contributing their expertise and collaboration. We’re looking forward to updating with a version that uses PongoOS as the bootloader!